-
Getting Started
-
Collaboration
-
Automations
-
Integrations
-
Import & Export
-
Privacy and Security
-
Affiliate Program
-
Announcements
Workspaces
What Is a Workspace?
Once you sign up for Infinity, the first thing you will need in order to get started is to create a workspace.
A workspace is the highest-level unit of Infinity that encompasses all the projects you want to organize and all the information related to those projects. A single workspace consists of boards.
It's important to remember that all of our plans come with one workspace only. In order to get more, you will need to purchase a new plan. You can check out our pricing plans here.
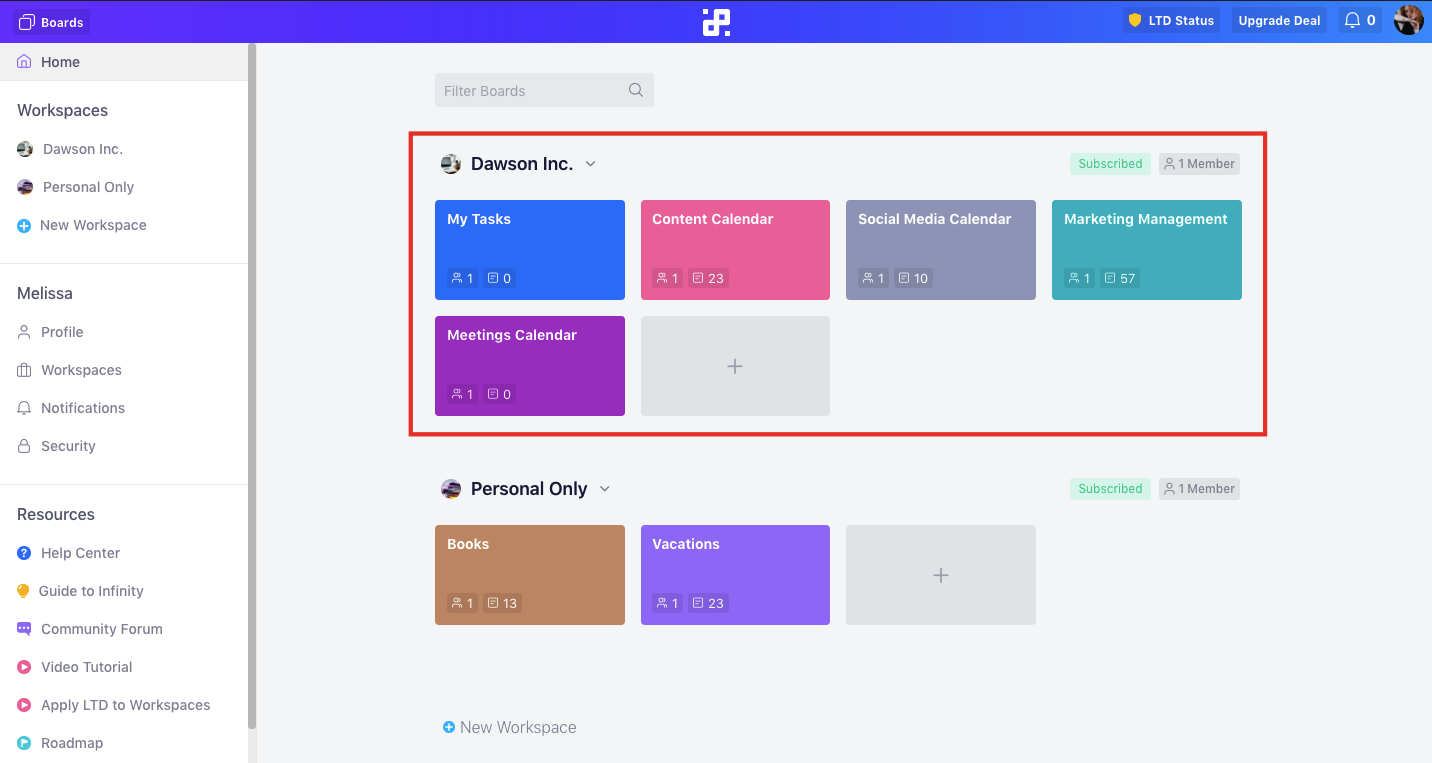
So, how do you use your workspace?
For example, if you’re a company owner, your workspace can be the name of your company, and the boards inside that workspace can be your company’s departments.
Or, if you’re a freelancer, a workspace can include all your freelance work. And within that workspace, you will have different boards for different clients or projects.
How to Create a New Workspace
To kick things off more quickly, you will be able to create and name your first workspace during the sign-up process.
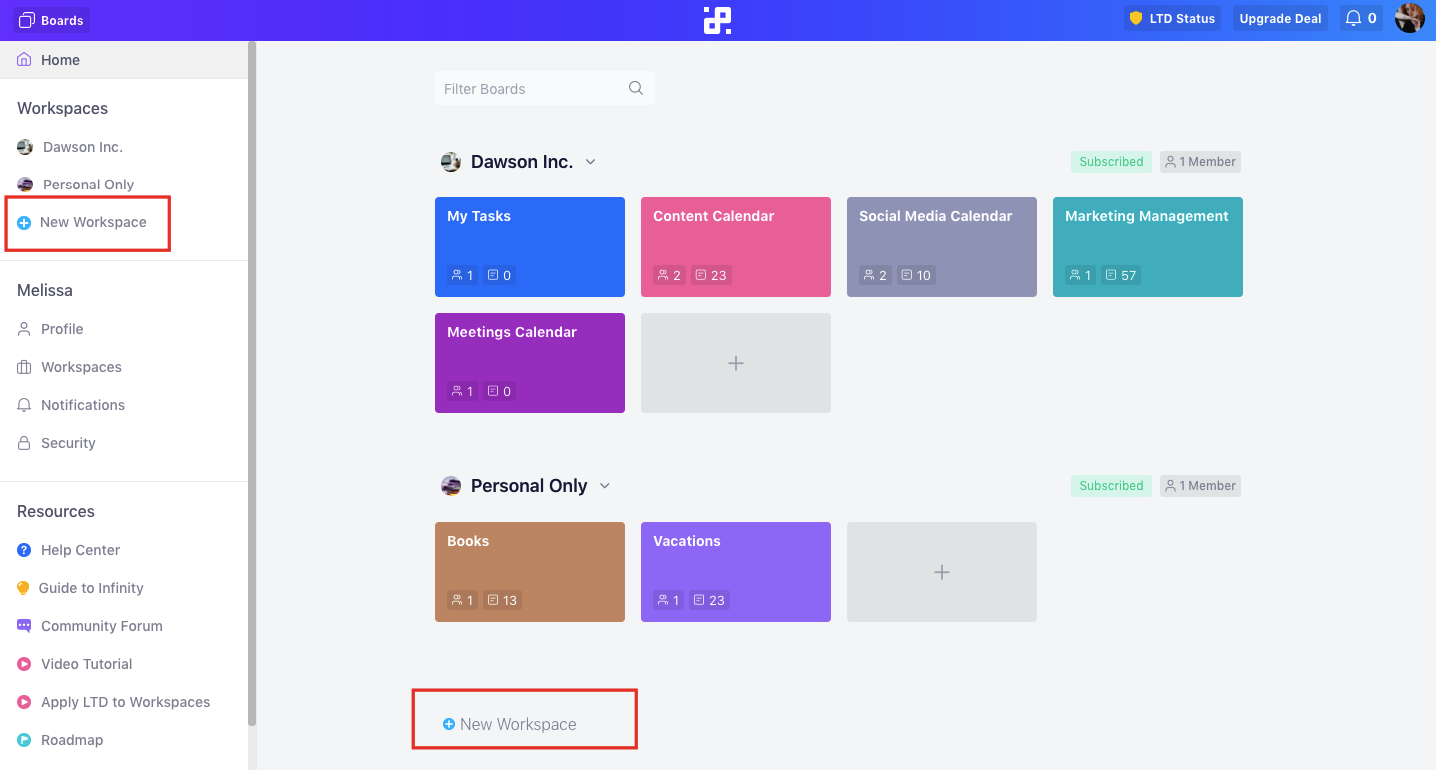
When you sign up (and each time you log in again) you will land on your Infinity dashboard. To create a new workspace, just click + New Workspace below your existing workspaces in the left-hand sidebar of your dashboard or at the bottom of the dashboard.
Once you click the button, a new window will open that will allow you to create and customize your new workspace. You will be able to set an image for your workspace, give it a name, invite members to join and choose if they’re going to join as ‘admin’, ‘full member’, or ‘restricted member’.
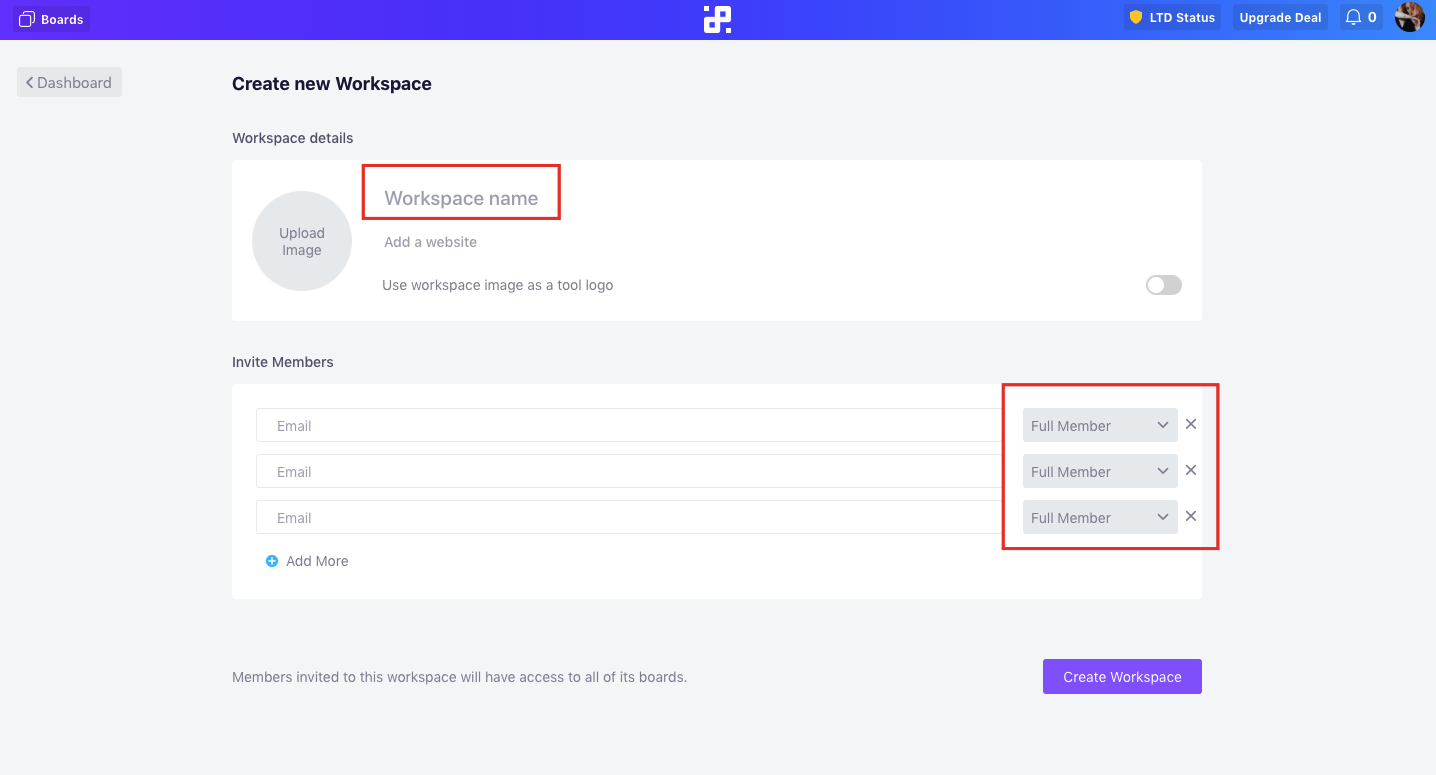
When you’re done, just click the ‘Create Workspace’ button and you’re all set.
How to Navigate a Workspace
First and foremost, you will want to fill your workspace with boards. Add new boards by clicking the gray button with a plus sign that will always be placed right after the last board you created. Read more about creating a board in the Boards section.
You can further customize your workspace by clicking the little arrow next to your workspace's name. Once you click the arrow, four new options will appear: Settings, Members, Boards and Billing.
Note that you will only see all four options if you're the owner of the workspace.
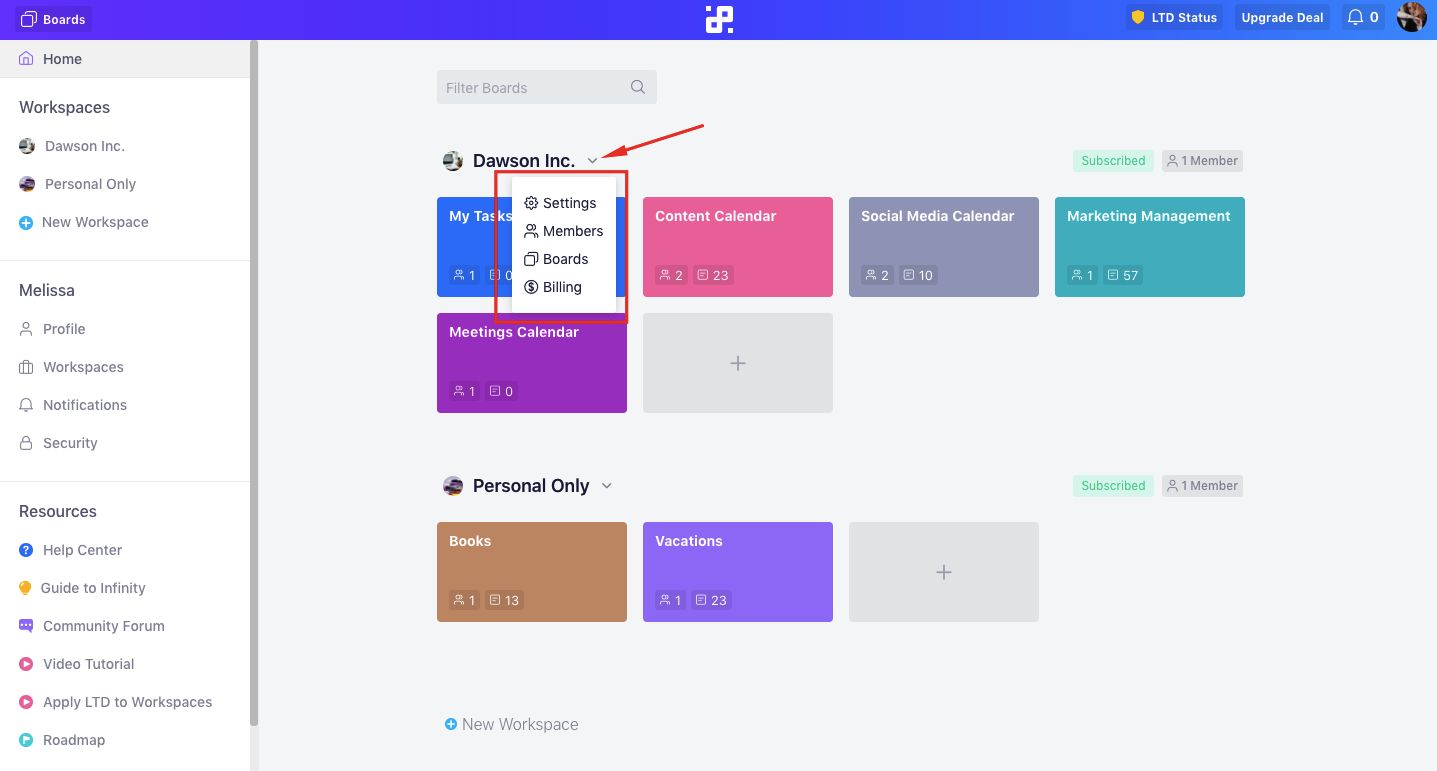
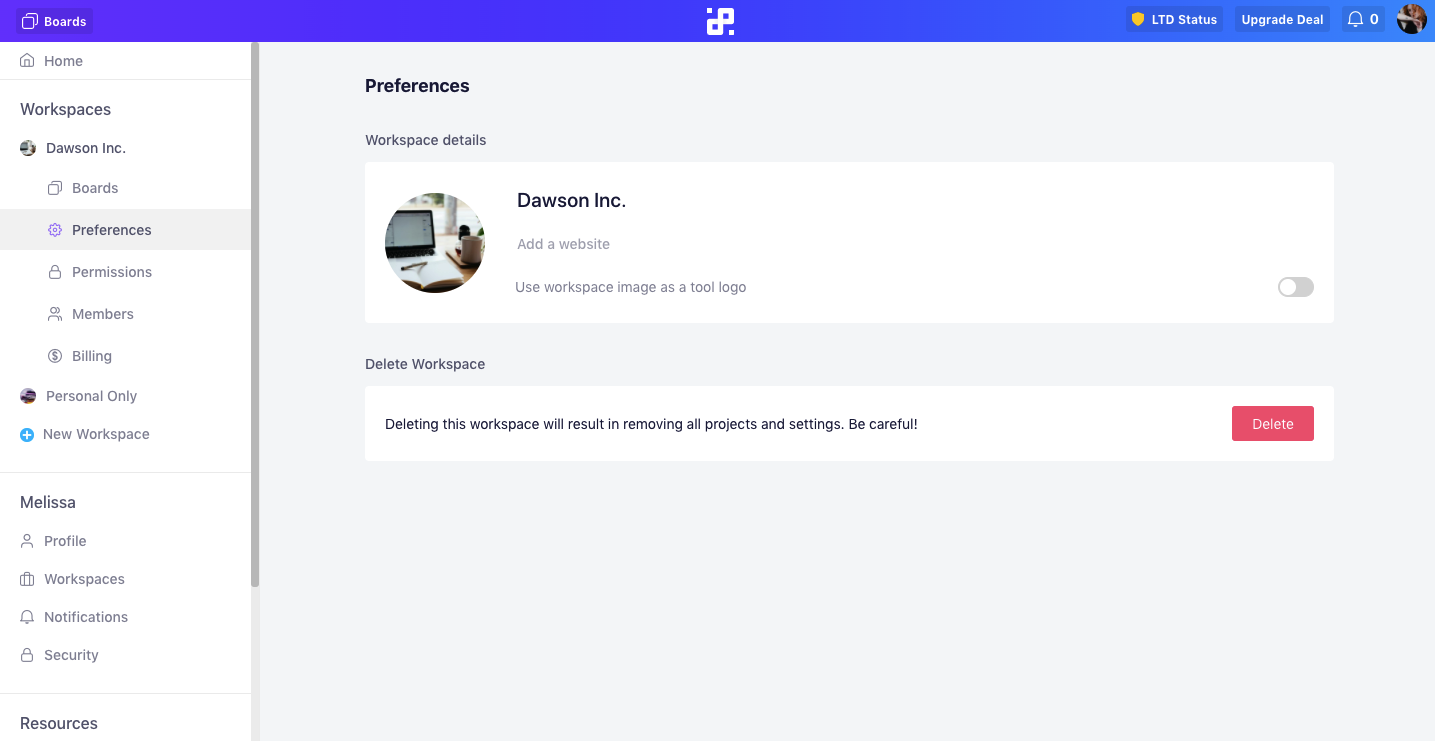
By clicking on 'Preferences', you will be taken to a window with your workspace details. This is also where you can delete a workspace if you ever decide to do that.
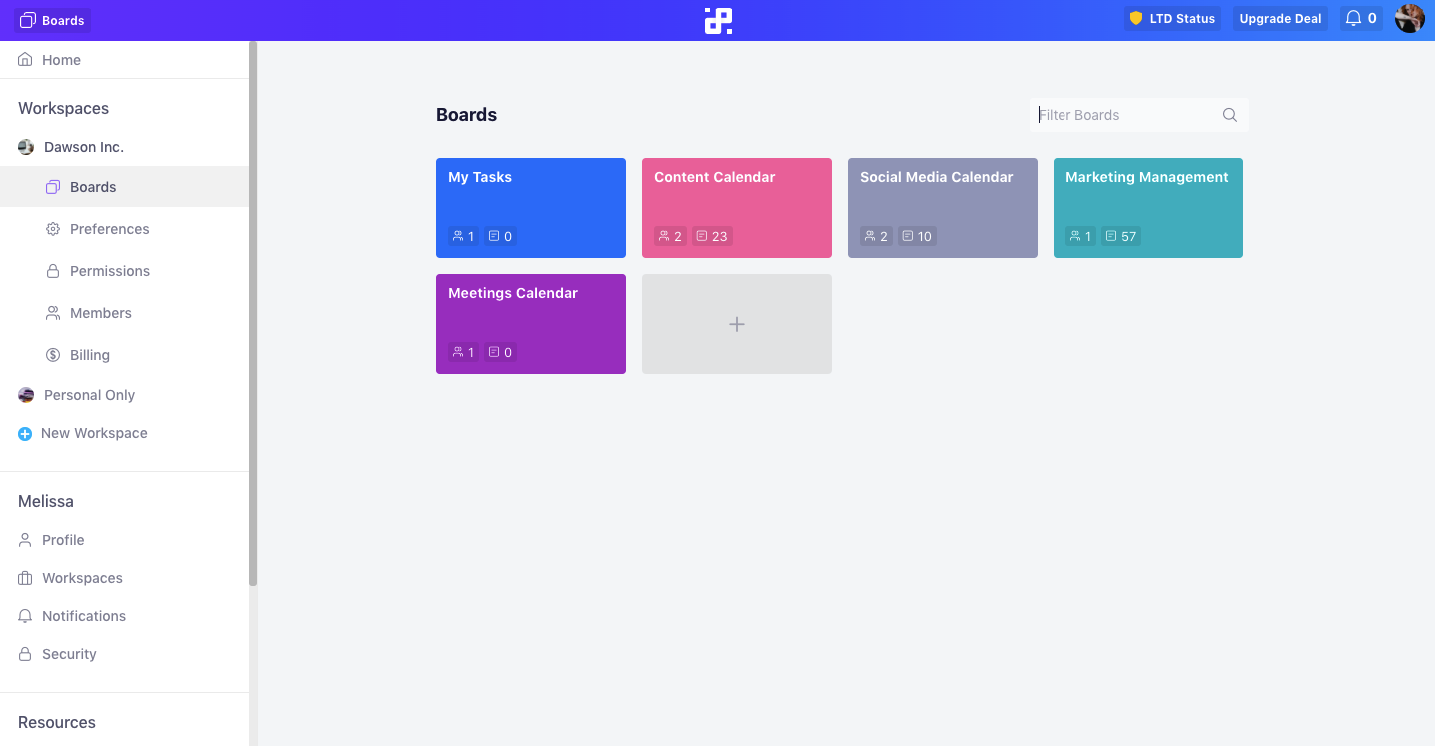
By clicking on ‘Boards’, you will get an overview of all your boards and an option to create a new one.
The ‘Members’ section is where you will get an overview of all the members that are collaborating in this workspace. You will also be able to add new members to the team by typing their email address and assigning a role to them, as well as deciding which boards you want to add your team members to.

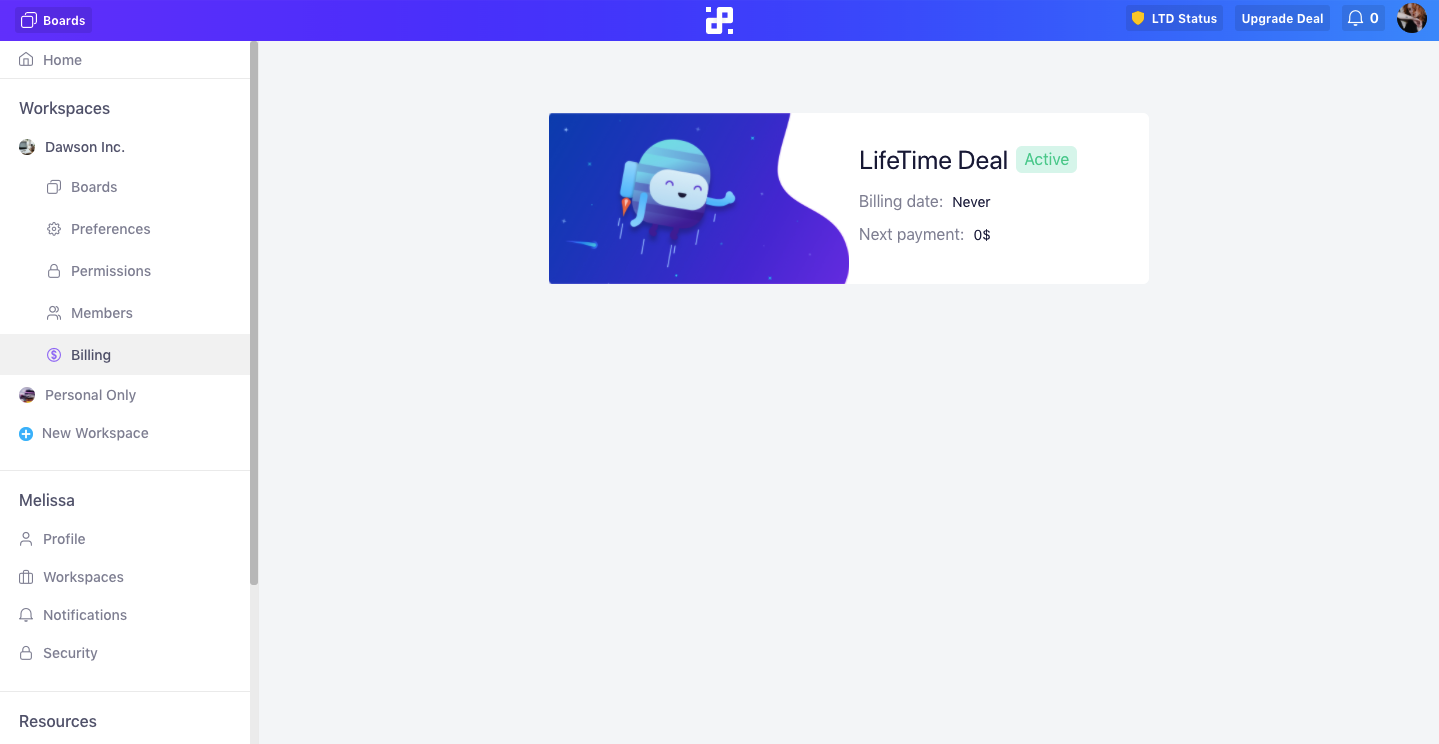
In ‘Billing’ you will be able to see the plan you’re on and when your next payment is. Since we’re currently running our LTD offer, what you’ll see here right now is the status of your plan.
While you’re browsing one of these four sections, you will also notice another section called ‘Permissions’ in the left sidebar. This is where you can customize your team members’ roles and what you want them to be able to do within a workspace or across different boards.

How to Reorder Your Workspaces
In Infinity, all the workspaces you create or become a part of are sorted by the first letter of their name i.e. in the alhpabetical order.
At times, this can get a bit messy, which is why it's a good thing you can easily reorder your workspaces so that they are sorted in the way you want.
To reorder your workspace, first click on 'Workspaces' under your name in the left sidebar.
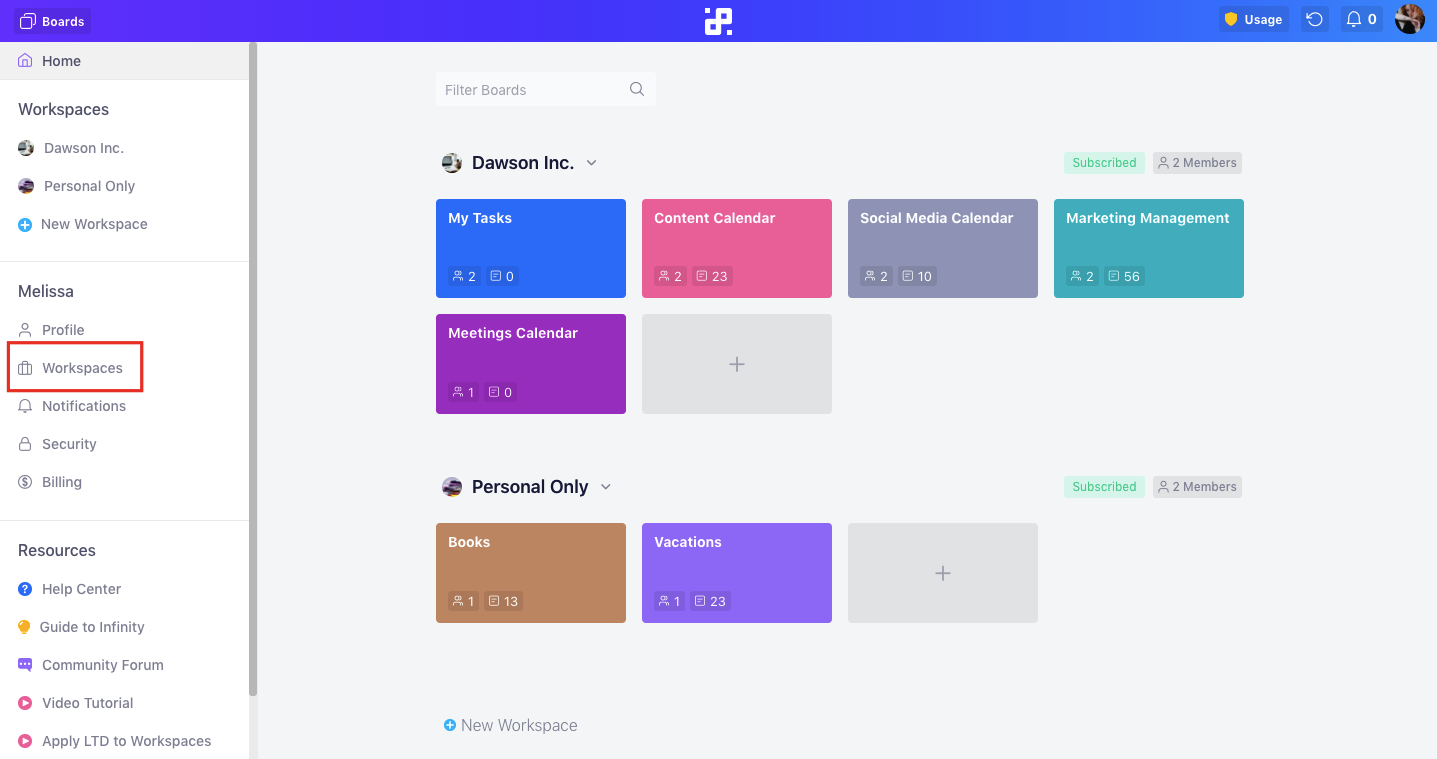
In the next window, hover over the workspace you want to move, and then drag and drop it to the position that works for you best.
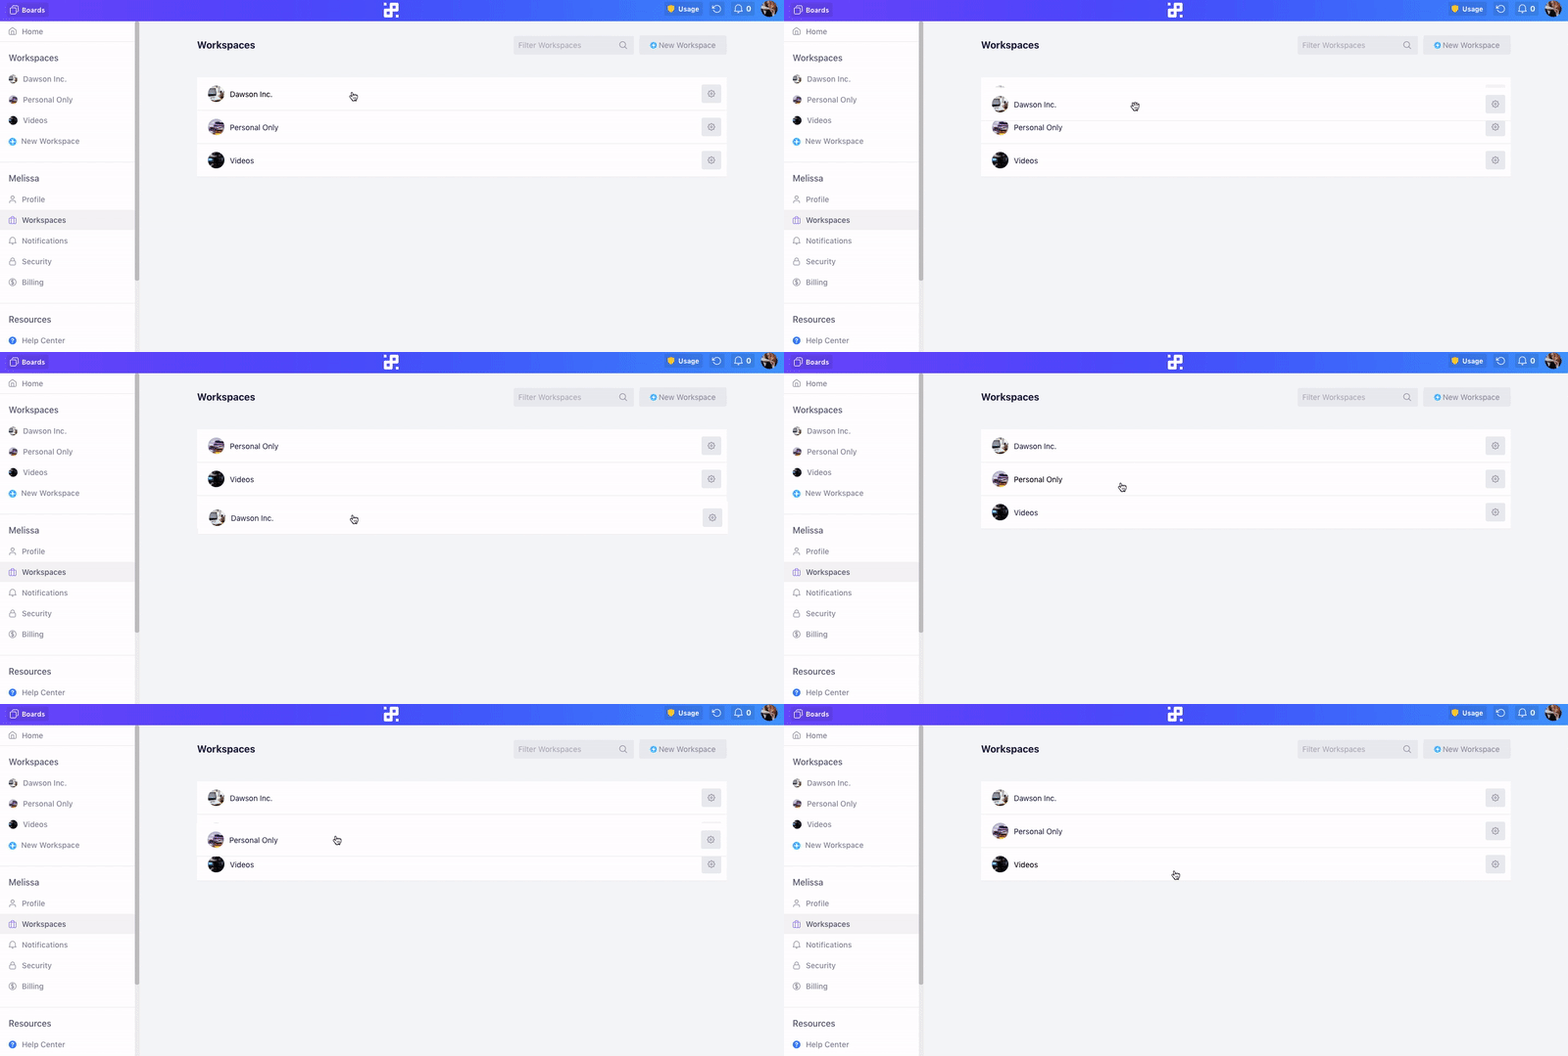
When you're done, your workspaces will be rearranged on your Dashboard, as well.
Deleting and Leaving a Workspace
As we already mentioned, as the owner of the workspace, you get to delete it anytime you want by going to Preferences under the name of the workspace in question.
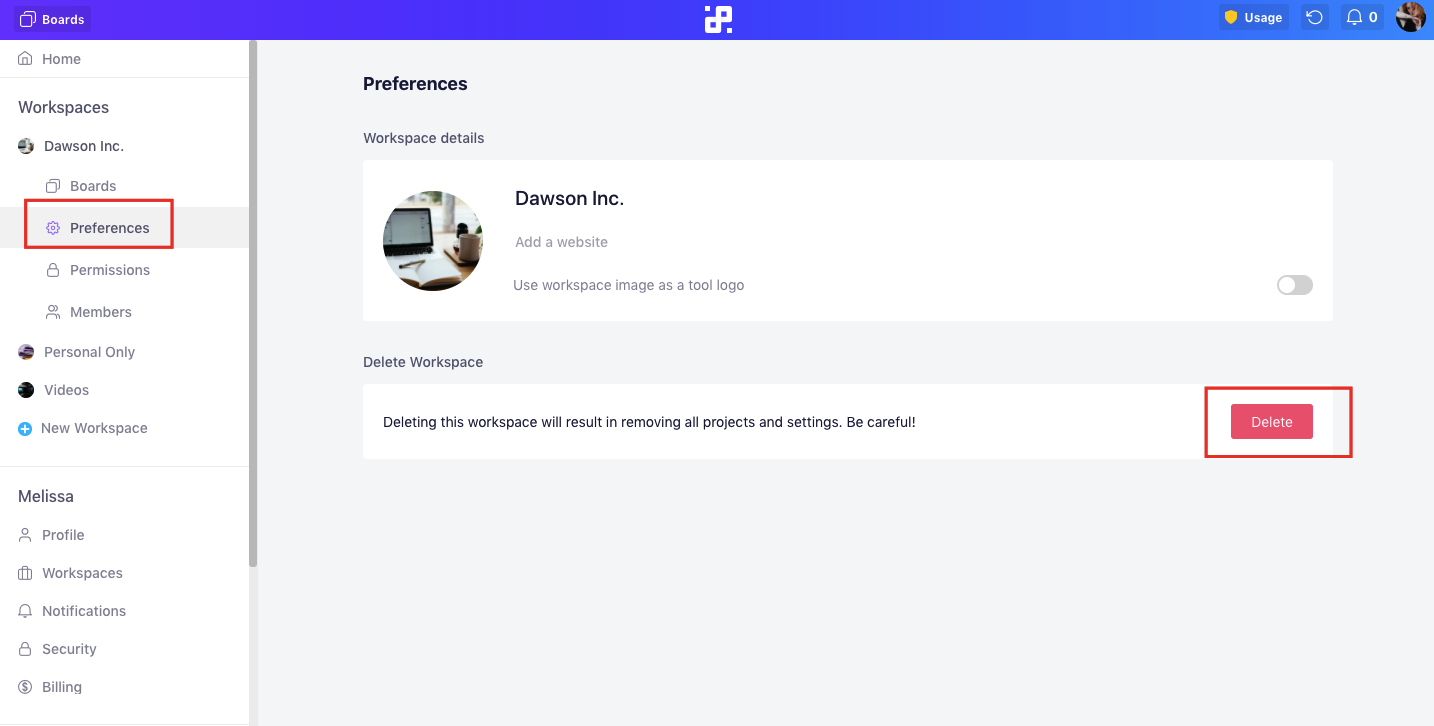
Keep in mind that, once deleted, a workspace can't be restored.
If you're not the owner of a workspace, you won't be able to delete it, but what you can always do is leave that workspace.
If you head over to the 'Workspaces' section underneath your name in the left sidebar, you'll get a list of all the workspaces you created or are a part of.
Next to those you created, you'll see the standard cogwheel which will take you to 'Preferences'.
Next to those you've been invited to, you'll see a button which will allow you to leave a certain workspace.
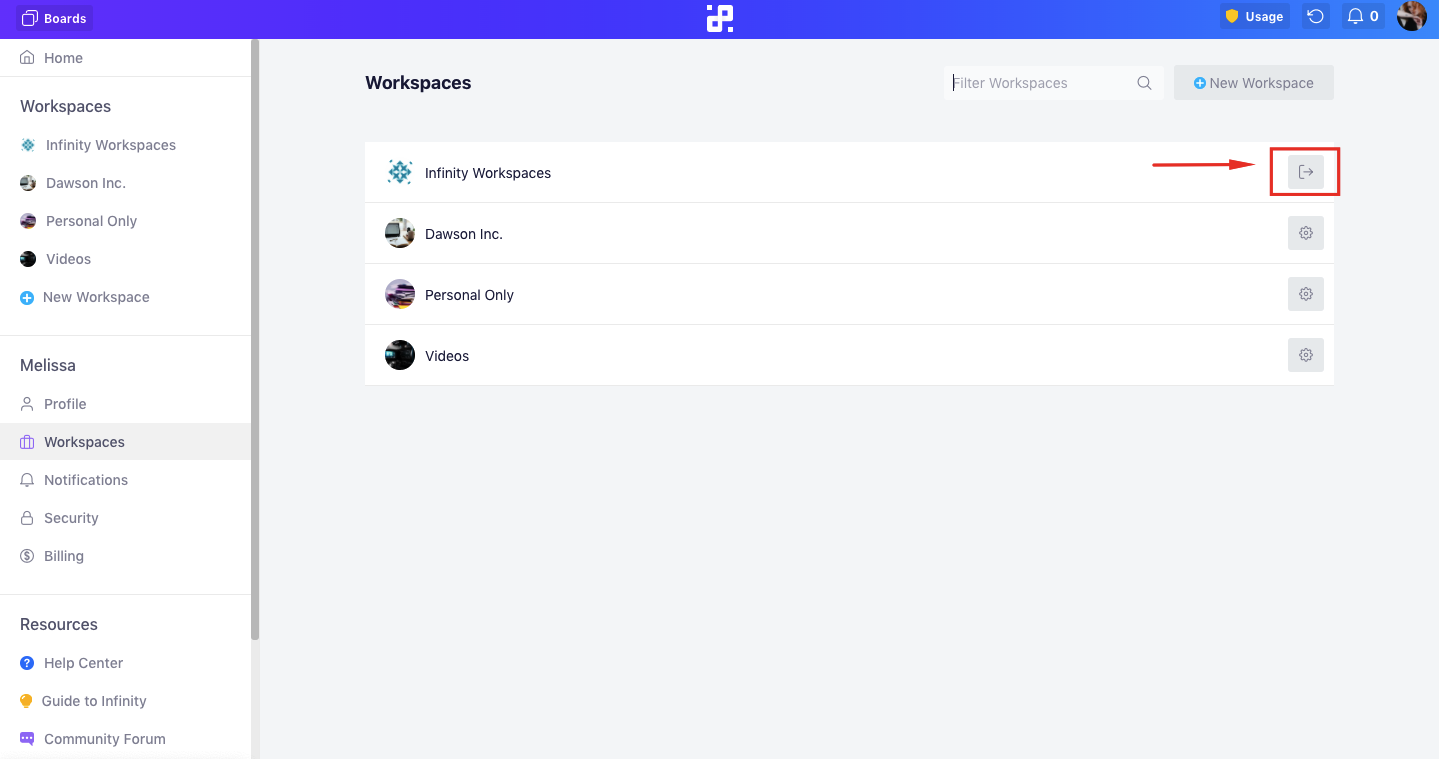
When you leave a workspace, keep in mind that all the data you created, including boards, items, comments, etc. will still remain in that workspace until the owner decides to delete it.
Now that you’ve created and customized your workspace, it’s time to start organizing. Create your first boards and let’s get started!